Showing posts with label tutorials. Show all posts

Tuesday, April 19, 2011

Undiscovered Tip - Set Up a Google Alert For Your Shop

Hi Team Discovery! This is Kam of Campfire Chic here to share with you a really useful (and free!) tool that should be in your crafty toolbox.

Adventure Bound Mini Notebook from CampfireChic

A little background: In November, I hosted a series of posts I called SEO Week/Optimizing Your Online Presence. Some of the posts are down for maintenance, but one of the posts I think is the most helpful is the one I'm sharing with you today.

Who is Talking About You? Setting Up a Google Alert

My boyfriend (an SEO Specialist) calls this "Brand Reputation Management". He says it is a good tool to use if you want to follow a news story like a natural disaster, or find out what is being said about you and your brand.

How is this related to SEO? It goes along with building links. You may not know when you are "talked about" on another blog, so this will give you a heads up so you can check out the resource. Sometimes I only find out an item of mine was featured on a blog because I notice a significant amount of traffic coming from the source in my Google Analytics. With a Google Alert, I will know right away... or at least on a weekly basis... if an item is featured (and somebody mentions my keyword).

I liken this to a more well-rounded and less messy version of checking your backlinks. From what I can tell so far, unlike backlink reports, Google Alerts does not report when you leave a comment on somebody's blog or website.

Why do I care? Think about all the blog comments we leave every day, heck for one giveaway I may leave 5 comments! I don't want an alert for each time I comment on a blog... I know I left a comment there. So Google Alert isn't looking for your hyperlink, it is looking for your search term. Nice.

Now that you know what Google Alerts offer, get the step-by-step directions and additional commentary by heading over to the original post on the Campfire Chic blog.

------
Kam is a twenty-something-year-old living in Southern California with her boyfriend and many animals. She blogs about her outdoor adventures and love for crafts on Campfire Chic and sells camping-themed items in an online shop of the same name. She enjoys hiking, camping, reading, and eating tacos.

Tuesday, March 29, 2011

Undiscovered Tips for New Etsy Sellers by The Merriweather Council

Danielle, aka merriweathercouncil, runs a very successful shop on Etsy full of modern, chic embroidery and fabric patchwork wall art.  She is also a member of Team Discovery and enjoys sharing her knowledge and insights with new (and not so new!) Etsy sellers and handmade artists through The Merriweather Council blog. Today she's sharing some of her favorite lesser-known tips for Etsy sellers - take it away Danielle!

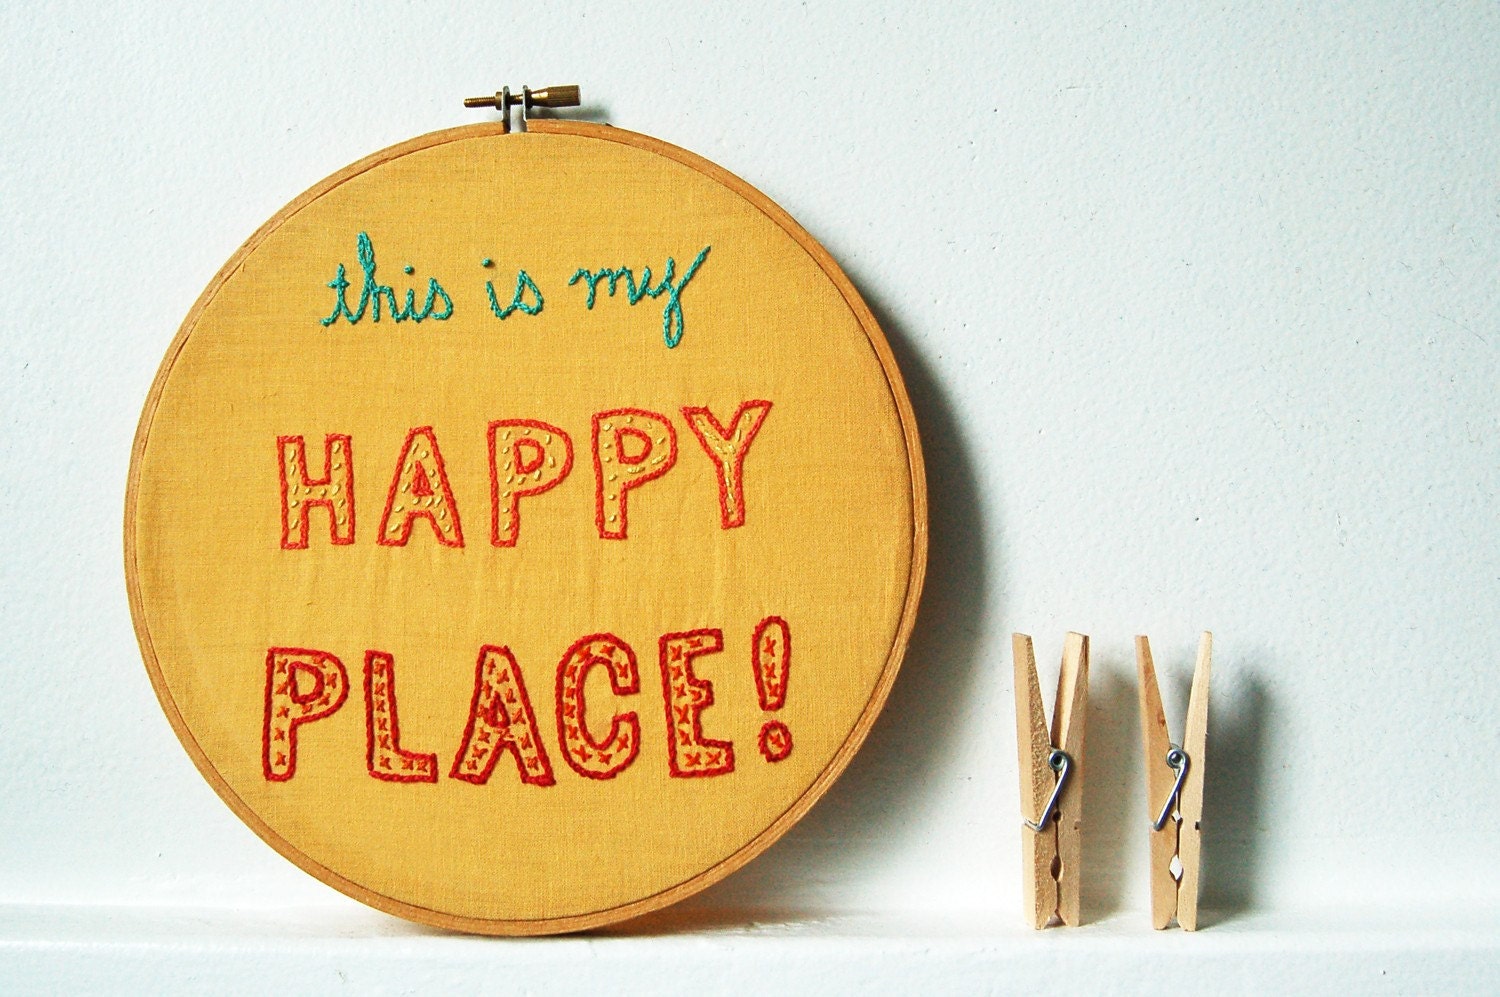
This is My Happy Place, Hand Embroidery by merriweathercouncil

1. Use Google Analytics to Find out When your Shop is Getting the Most Traffic
Ever wonder when your shop is getting the most views? Or wonder when the best time to list an item is? Firstly, set up Google Analytics on your shop. (Links to Meagan Visser's video tutorial.)

If you already have it set up, log in and look over to the lefthand side of the screen, do you see this?


Click on "Visitors", then "Visitor Trending", then "visits"

Now you can pick what you want to see, by hour, day, etc...

Let's go to "Hour" (It's the little clock icon over more toward the right side of the screen)


This is where you will be able to see quite clearly when your shop is getting the most traffic! Simple!

2. Don't List Everything at Once
Make the most of your listings and post 2-3 at a time. Why 2-3? If your photos are cohesive and look like they go together (ie, similarly styled) and you post 2-3 products in the same category at the same time, your little grouping will attract more attention, and stand out better in the search results than just one listing would! But don't be obnoxious and post 17 things at once, because then people just glaze over and that is not what you want!
3. Save Your Listings to Post Later
This little trick allows you to create you listings when you have time, but post them when you actually want to, possibly based on what you have learned by looking at your analytics. 

All you have to do is go through the process as you normally would... and go through to the very last step where you would normally click finish.


Now, highlight, and copy the address in the address bar (^^^)

Take this, and paste it into an email to yourself, and send it.

Now you have an active link back to this page, and anywhere you can check your email, you can click this link and get back to this final page and post your listing! This is great to use when you are out of town, or having a busy week!

4. Lower Bounce Rate
Now that you know when people are looking at your shop and leveraging that info by being more aware of when you post things, you want to keep them around as long as possible! 

Most browsers (potential buyers not their internet surfing application) are going to land on ONE of your listings, not your main shop page - makes sense, there are a lot more opportunities for them to get to one product rather than your main shop home page. And many people might not be familiar with Etsy or understand how to see more of your work. Make it more obvious to them and link back to your main shop page in each listing.


This lowers what is known as your "bounce rate" - you simply lead people back to your listings over and over again to keep them in your shop and help them find more of what you are offering. You can link to a specific section, you policy page, your main shop page, whatever you like. You could link to all these places but I would suggest either your main shop page or a specific section. You don't want to be annoying...

Adding these links also builds your back link count, which is helpful for google rankings - basically, the more links there are on the internet to you shop, the better.

Thanks Danielle!
If this information was helpful, head on over to Danielle's blog to see more tutorials on topics like making beautiful treasuries, using props in your photos, finding your target market, and much more.  Also don't forget to stop by her shop on Etsy to see her latest listings!

Tuesday, November 2, 2010

Tutorial: How to Add a "Grab My Button" to Your Blog!

Originally posted by waterwaif on her blog here


I have been talking with other bloggers lately about trading ad space with each other for free for 30 day blocks. I think it's a fantastic idea, a great networking tool, and a way to support each other while still getting the word out for your shop or your blog.


But rather than have to email each other attachments every time you want to trade ad space, I realized that you can just add a Grab My Button! ad on your side bar for them to just, well, grab!


On the left sidebar is an example of a Grab My Button! and please, feel free to, um, grab our button.


Here's how you can add one to the sidebar of your own blog for easy grabbing:


1. First, make sure you have an ad or a button. The easiest way to do this, as I did, is to take a photo of one of your products and add your name or link to it with photoshop or a similar program. It's best to keep the image size under 200 pixels wide so it will fit in most sidebars.


2. Upload your new ad to any hosting site. I use http://photobucket.com because it is free, but there are a lot of options out there for web hosting.


3. Now, open a new tab or window and go to your blog. This tutorial only works with blogspot as I have never tried anything else. Log into your blog, click customize, then Layout, then page elements. Click 'add a gadget' and then select 'HTML/Javascript'.


4. Copy and paste the following in the text area:


5. Keep that window open and go to Photobucket, or whichever photo hosting you are using, and copy the direct link URL for your ad. Then come back to your blog window and paste that URL in both places where I've written YOURADURLHERE. Make sure you leave the quotation marks as that's what keeps a link active in HTML.


6. Then, see where I've written YOURBLOGURLHERE? Put your blog's URL there. Or your shop. Or whichever site you want to link to.


7. Make sure you save.


8. Go forth and multiply.


Sunday, October 17, 2010

Tips and Tricks to Making a FP-worthy Treasury


Originally written and posted by merriweathercouncil on her blog here


Here’s a Quick Little Lesson in What I have Noticed. *
*Not hard and fast truth, just observations. Etsy had nothing to do with the writing of this, this is all me, so don't take this as the undeniable truth, I'm just telling you what I have noticed. K?

Basic factoids about the Treasury (known as T from here on out):
The first three items show up as thumbnails for your T in the treasury list. Put three things that will entice clicks and views and traffic in these spots. They can be strong individually or compliment each other, which is actually what your entire T should do.

Having said that, views and clicks don’t seem to matter in terms of the chosen FP Ts. Yes, the longer your T is “hot” and if it is on the first page of the Treasury for a while, that doesn’t hurt, but rest assured it is no guarantee! I have had Ts make it to the FP, and have seen others that had no comments and barely any views, go to the FP.  Bottom line is that whoever is picking the FP will pick what they will, not what is “popular” or in Etsy language, “hot”

The first 12 boxes (top 3 rows) are the primary picks for the T, this is where you want your meat and potatoes, that is, cover all bases that need to be covered up here. What the heck-o am I talking about? I’ll get to it. When a T goes to the FP and something sells, the first item in the bottom row is in! And so on, so these are just as important, but to get the ball rolling, let's make sure we cover our bases up top!

Another fact is that those little tips to the far right hand side of the treasury template are actually useful, although not super specific. Also, no one really knows what the secret is to getting at T on the FP but here is what I have noticed:

This is what they tell us on the treasury template:
“If you'd like your list to be chosen for inclusion on Etsy's home page, here are a few tips:
               Be diverse! No more than one item per shop.
               Don't include your own items. Spread the love!
Make it beautiful.”

You want to have VARIETY
(aka, be diverse, but in more ways than just not including two items from one shop!)

You want to have variety in the following areas:

-ITEMS in your treasury, that means, you don’t want to have 10 bags and 6 necklaces or 6 rings and 14 photos. Hit up new categories: woodworking, make up, wall decals, books and zines…

-PRICES have at least one thing under $10 and at least one thing over $100 in the top 12. Try to hit all price points: very low  ($10 and under) medium ($20-$60) and high ($60 and up), even very high ($300 and up)

-PICTURE COMPOSITION have some items that are cropped, some that are in full view, some with interesting depth of fields (that means some of it is out of focus, in an artistic and intentional way), some have props, some don’t,… you see how it is.

-TASTE it’s nice to see something new, innovative, interesting, or unusual sometimes. Think big, grandeur, haute couture, things that people might not be buying a ton of but LOVE to look at.

While you want to have variety you also want to be CONSISTENT. (aka, make it beautiful)
Have a theme or color palette – what brings these items together? What made you want to put this one next to that one? The Ts with set themes, color palettes or concepts are the ones that make the FP. Seriously pay attention to the FP or look through a few on craft cult and I bet you 9 out of 10 times they will have a theme or color palette.

When Etsy speaks, you LISTEN.
Basically, Etsy depends on it’s member curators to create the Front Page.  But they are the ones who pick what ends up there. So when they tell us what to do, we should obey – obviously there are always a few fancy Ts that don’t match what they say they want that end up on the FP but why not at least try to appeal, most of the time, to what they are telling us they want? Every month Etsy releases a merchandising report, in this report they give a run down of trending themes, ideas and concepts and tell us what’s popular these days. Some of it is super obvious, in October, Halloween is a trending theme, and along with that comes pumpkins and witches. Some of it is less obvious. November’s report cites “chalkboard and writable surfaces” as a trending theme. I don’t know about you but, I don’t normally associate chalkboards with the fall, but it makes sense: chalkboards are rustic and have a vintage feel to them, and those are things that DO remind me of fall. See how it works?

A big part of getting on the FP is paying attention to what else is there. So check in frequently, there is a definite “style” and a certain aesthetic that is favored on Etsy, so instead of getting upset and outraged over it, just take it for what it is. If you can’t beat them, join them! And most importantly, you have to be in it to win it, so don’t give up!!!

Wednesday, October 6, 2010

Tutorial: How to Take a Screenshot

written by waterwaif


Being a seller on Etsy, I sometimes find my items in treasuries that other sellers make. These are always such beautiful collections that I want to take a screenshot, or screen capture, and share these with other people. In talking to a few of my friends the other day, I realized that some of them did not know how to do this. It's super easy. Watch!


Make sure you have the webpage that you want to capture centered on your screen. Look at your keyboard and find the 'Print Screen' button. This is usually somewhere near the top right, to the right of the F12 key.


In some systems, it works fine for you to just press the 'Print Screen' button, but with mine, I have to press 'Ctrl' and 'Print Screen' at the same time. Some systems require you to press 'Alt' and 'Print Screen' at the same time. Try one, test it with the next step or two, and if that doesn't work, try it the other way.


After you've captured your screen, you need to have somewhere to put it!
The easiest place is in your Paint. If you have Windows, you almost certainly have Paint. Look in your start menu.
Start Menu --> All Programs --> Accessories


Once Paint is open, you will see a blank screen. Perfect for pasting your screen capture!
Up at the top in Paint, you will see the Paint menu. Click on Edit and select Paste. Your screenshot will be pasted right there! If Paste is not an available option, that means that your screen was not captured. Try capturing it again with the step I listed above. Try 'Ctrl' and 'Print Screen' together or 'Alt' and 'Print Screen' together, and test it by checking the Edit menu in Paint.


Now that you've taken your screenshot and found somewhere to put it, you could be done! If you like using images as bitmaps or find that it doesn't matter to you either way, then just save your screenshot and you're done.
If you want to crop or otherwise edit the photo, save it and reopen it using your photo editing software. When you save it after editing, it's best to save it as a jpeg. How to edit the photo is a tutorial for another day. I hope this post helped someone!


Edited to add Jenn's comment for those on Macs. Thanks, Jenn!


Jenn said...

If you're on a Mac, you can hit Command-Shift-4 and it will give you a little cross-hairs icon. Position that at one corner of the area you want to capture and press the mouse button. Holding down the mouse button, draw a box encompassing everything you want in your screenshot. When you release the mouse button, you'll hear a camera-shutter sound and you should be able to find your screenshot ready-to-go on your desktop.

Saturday, October 2, 2010

How to Start Out on Twitter and Be Successful at It

Originally posted by waterwaif on her blog here


We all had to start somewhere. Some of us are newer than others at blogging, tweeting, selling, living, whatever. There are lots of things I had to piece together on my own, or dig up, or just get slapped in the face with before I learned them and so I'm going to pass on that information to whoever happens to be reading this. Congrats, that's you! Unless there's no one here and then I'll just talk to myself. Either way.


Today's Tip of the Day: Twitter


Are you lost on twitter? Does it confuse you? Maybe you're scared to sign up or don't know how to use it effectively? Do you care? You should.


Twitter can be a powerful tool for your online business. It can also be a wonderful place to make new friends. Ideally, you will combine the two. I'll try to help you figure out how.


1. First, set up a Twitter account.
The best way to do this is to make it the same as your Etsy ID, your Artfire ID, your domain name, etc. You want to trademark yourself across the internet and be recognizable.


2. Fill out your profile and add an avatar.
This makes you more accessible and people can more easily gauge if you'd be a good person for them to follow. 


3. Find some people to follow.
Don't go crazy and just follow anybody. That will end up driving you crazy and add to your confusion later. Twitter has a search box about halfway down on the righthand side where you can search by subjects. Are you a painter? Type art, artist, painting, acrylic, or something similar in the search box and you will find people who have used those "hash tags" recently. These are probably people you will want to check out.


It is also good to find people who share the same hobbies with you, so it's not always about business on Twitter. Do you like to garden? Try searching gardening terms. Or cooking terms. Or music.


It is also a good idea to figure out your target market for your business and aim at having some of those people follow you, too. Do you sew and sell purses? You might try finding well-known fashion magazines on Twitter and following a few of the people who follow those magazines.


4. Comment and reply on the people you follow.
If you see a tweet that sounds interesting or asks a question, answer it! Make sure it is addressed to the person you are replying to so they see it. Meaningful conversations are a great way to meet people and become known on Twitter. Other people can see the conversation and think, "Hey, that person sounds interesting! Let me check them out!"


5. Follow back.
You don't have to follow back everyone who follows you. But check out their profile. If they look interesting, follow them back! If they just spam links to their own items, feel free to pass. 


6. Make a few interesting tweets throughout the day.
Don't be one of those people who tweets what they are doing 24/7. No one will care if you are going to the bathroom at 7:47 am and eating toast at 7:52 am and waiting for the mailman at 8:02am. Tweet things that others will respond to or find something in common with or that are just plain interesting. Tweet a few things in the morning to connect with the morning crowd, a few things in the afternoon for a different crowd, and a few things in the evening, too.


7. Let people know you're now using Twitter.
Do you have a facebook fan page? (New tip of the day blog post about that soon) Let your fans know your twitter link. Do you have a blog? Put a 'Follow me on twitter' link there. Visit discussion forums and join in on the twitter talks and see if anyone there looks interesting and add your links if they do.


8. Visit http://wefollow.com/.
Here you will find a ton of categories to browse to make it easier to find people you'd be interested in following in the subjects that interest you.


9. Be somewhat consistent.
Don't post a ton of stuff on Monday and then forget to check for a week. People like other active people and will engage much better if you're active. And interesting. (Notice a theme, yet?)


10. Use Direct Messaging sparingly.
This is a big one with a lot of twitterers. DMs are for saying things to people that you don't want public. A lot of people use DMs to spam. Don't do this. Don't send a DM saying "Hey, thanks for the follow. Come buy my stuff." Don't send a DM saying "Retweet this for me". Don't send DMs just to say "Hi."


Okay, well this ended up longer than I'd intended but what the heck. Hopefully it will help someone! If you have any twitter tips and tricks, feel free to comment and let me know!

Tuesday, September 28, 2010

Tagging Your Treasuries


Those 18 spots to fill after making a treasury can seem a bit daunting. But eventually you'll get to a point where you wish you had more! The following tips are intended to be used on treasuries that meet the Team Discovery criteria (at least half of your spots given to new/undiscovered shops):

The given tags that should always be used on a Team Discovery treasury are "teamdiscovery", "new", "undiscovered", "pounce" (only if you actually have at least one shop found using Pounce), and "lessthan20". Notice there are no spaces inbetween the words. If you are participating in a challenge, you should use all of the above plus "tdchallenge."

Now you have 12-13 spots left. The first thing you should do is look at the monthly Merchandising Desk themes and colors. September is here and October is here.

Look at colors. Let's take September's Merchandising Desk for example:

"Color Trends: Punches of turquoise, richer earth tones, mustards, cranberry, deep berries and wine, muted greens, gray and camel solids."


Let me preface this by saying you should never tag your treasury with colors/themes that do not reflect what you have in your treasury. That would be very misleading and some would call it cheating. But if you have any of those colors at all, you should use those specific words - "camel solids" or "muted greens". You may also want to try different variations of those words like "light green" or even a specific type of light green like "mint" or "sage".

Also in the Merchandising Desk for September, they specifically look for certain themes:
"Woodland Emphasis: Forest animals, especially foxes, bears, and owls. Feathers, acorns, wood-grain, branches, logs, and leaves."

If you have even one owl, tag it "owl." Use as many of those descriptions as you can.

There are tons of themes in the Merchandising Desk. The above were only a few examples of many. The nice thing about the Merchandising Desk is they actually give a list of specific words. Go through all of those lists and see if any of them fit your treasury.

I have always overlooked this, but here's a tagging tip straight from the mouth of Etsy:
"Tagging tip: As Etsy continues to become a more global site with international currencies and languages, consider internationalizing your item listings. When tagging your items, be sure to use all 14 tags to describe your item; as you run out of words, use a thesaurus and language dictionary to generate new variations of your most important tags. Great languages to start with include French, German, and Spanish."

Please notice though there is actually room for 18 tags. Please try to use them all!

In addition to the themes Etsy chooses each month, there are also lists of trending treasury searches that are different every day. If you go to the main Treasury page, you will see to the right "Today's Trending Tags." Today it happes to be - beautiful, fun, winter, creative, cute, nature, earthy, fashion, bright, cream. If you've run out of ideas for themes and colors, go to the "trending tags" and see if any of them match your treasury.

I hoped this helped! Please feel free to leave in the comments anything I may have missed and/or how you tag your treasuries.

Sunday, September 19, 2010

Managing Friends on Facebook

by, Jennifer

Having 30 or 40 friends is not hard to keep track of. But when you have a few hundred friends, one can easily loose track of their friends. So, how to manage your friends? The easiest way would be to use lists. Create a list named Surfin' Buddies, Family, High School Friends or whatever is easy for you to know who those people are. Only you see your lists so no worries if you call a list "Enemies I am keeping close".

Where to start? Idealy, in the beginning is a good place to start but if you are like me, you created your facebook account and started adding friends. So start now. When you send or receive a friend request, add the person to a list by clicking on Add To List and selecting a list from the drop down. No lists? Simply type in a new list name and then send or accept the friend request.


Now, about those friends you already have. At the top right of any Facebook page, click on Account and click on Edit Friends from the pop-out menu.


Here you can manage your friends by adding them to a list, deleting them, moving them to another list, or just look for them.

To create a new list from Edit Friends, just click on Create New List and type a list name in the little box. Then you can scroll through the list in the pop-up box and click on each friend you want to add to that list. They will be highlighted blue if selected. To unselect, just click them again to remove the blue highlight. When you are finished, click Create List.


If you want, you can scroll through your list of friends and add each one to a list one friend at a time. Just locate the friend, click Add To List next to their name and click the list you want them to be added to.


Too many friends to scroll through? Looking for a particular friend? You can find your friends easily in 2 ways.

First, while you are on the edit friends page, you can type in the search box (on the left, not at the top) the first letters of their name. As you type, the list will reduce and show only friends with that combination of letters in their name.


Second, from any page of Facebook, you can type in the beginning of the name or page you are looking for in the search box at the top of the page. A pop-out box will show all pages, groups, friends, etc. that have those matching letters. Sometimes, it will show you even those you have not yet connected to.


Need to delete someone from your friends list? Yes, this happens that we picked the wrong person to network with. From the Edit Friends page, just find their name and click the X to the right of their name. A pop-up will ask you to confirm you really want to delete them.


And finally, now that you have your friends organized, where did those lists go? On the Edit Friends page, you will see the lists on the left hand side. Just click on the list you want to view, and only those added to that list will show up.

Wednesday, September 15, 2010

Keep Them Coming Back!


You work your butt off churning out new items for your shop. You take great photos, spend hours listing and perfecting your item descriptions, tag just right. You Facebook, Tweet, blog and more (ok, so maybe you dont’t do ALL of that, but at least some). And lo and behold, you sell some items! Now, how do you get your customer to come back for more?


I am blessed to have some wonderful repeat customers and am very proud of the feedback I have received. In that feedback, there are comments on how lovely the packaging was. I’ve even received convos after shipment with buyers expressing their happiness upon receiving a package so nicely presented. And once, I even received a hand-written note thanking me for such a great Etsy experience. These are accomplishments that mean the most to me. And to have them coming back for more is the best compliment anyone can pay to my shop.


Being an Etsy buyer as well, I have noticed all different types of cute packaging – all very different from each other. So there is no one way to present your item. But you should find your way. There are many variables that set Etsy apart from other huge, person-less companies out there. Packaging is a key part of the Etsy buying experience. Every detail in each transaction is crucial for customer happiness.

So I will lay out what I do after each sale. But it is up to you to find your own unique process. And our team invites you to share yours with the rest of us!


1. Once I have received confirmation in my e-mail that I have just made a sale, the first thing I do is contact the buyer, thank them for their purchase and give a time frame of when I will be shipping out their package. This is the only communication I do at this point unless there is a problem. I want them to know I have seen their order but I do not want to bombard them with e-mails.


2. I print out their mailing slip (through Paypal…it’s so much easier and it saves me from having to go to the post office. It’s also a tad bit cheaper than the post office) and adhere it to a bubble wrap envelope (this would obviously be different for each seller depending on what they sell).


3. In this photo, you can see all of the supplies I use for the presentation of my item. I take everything out at once so I’m not going back and forth getting things.This cuts the time down and if you have a busy week, time is important.


4. Every seller is different. Some jewelry designers prefer boxes . I prefer plastic baggies for two reasons : it is cost effective and they help to keep air away from the metals which reduces oxidation.


5. I then wrap the baggie in tissue paper. You can go to the dollar store and buy a stack of tissue paper for a minimal cost. Instead of using one sheet on one item, I cut it up in 4 squares so it will last me longer.


6. I then tie the package up with twine. Also inexpensive and it seems to last for several seasons.


7. In this photo, I have a piece of cardstock paper I bought at a craft store for creating gift tags. It came in a booklet of seasonal patterns. But I also use cards given at holidays, old calendars and anything I can find that has an interesting design. I did make a $15 investment in a circle punch to make the process quick and painless. I use this punch and cut out dozens of tags at a time and keep them in a tin.


8. I make sure to write a "thank you for your purchase" on the tag with a signature. Sometimes I write more if the situation calls for it. I then punch a hole at the top, thread the twine through the hole and then tie it off. My package is now ready to be put into the padded envelope.


9. I always add a business card in the packaging as well. On the back side of my business card, I offer a 10% discount on future purchases. This, in combination with the packaging, makes the buyer very happy. And it works! Not all of the time of course, but in many cases.


10. I follow up with positive feedback. I admit I may not get to this in the most timely of manners, but I always get to it eventually!


Please send us photos of your unique packaging! And any additional tips would be great. And if you have items that can’t be packaged this way because of size, shape, etc. we’d love to know what you do.

How to add a "How Did You Find Me?" question to your Paypal checkout

written by waterwaif


Ever wondered how your buyers found you and your stuff? Sure you did. And do. So did I!
And I've discovered that there's an optional question you can add to your Paypal checkout that asks your buyers exactly that: How did you find me?

The question is entirely optional and will appear at the end of purchase while your buyer is paying. It's super easy to set up, too!


1. Login to your PayPal account
2. Go to -->My Account -->Profile
3. Selling Preferences --> Custom Payment Pages --> Options --> Merchant Service Options
4. Check "Add a Customer Service Survey" and fill in the blanks with the choices you'd like to offer, i.e. Etsy, Blog, Twitter, Facebook, Friends
5. Save

And voila!
You will now be able to view this under the payment details in Paypal for each transaction.


Thanks for stopping by! If you found this helpful, please leave us a comment so we know!

Friday, September 10, 2010

Tip of the Day: Are You New to Selling?

written by waterwaif


Are you new to selling? Have you been wanting to sell for a while but were afraid to try? Do you find the idea of writing item descriptions daunting? Do you already sell but constantly look for ways to improve your descriptions? Maybe this can help! This article was originally posted on Waterwaif's blog here.


First of all, the best advice I can ever give to a seller: Describe your item like there are NO pictures at all, and take pictures like there is NO description at all. Then, when you put them together, you've got magic.


In this blog post, I'm going to cover most of the things you will need to include in your description, whether you sell on Etsy, eBay, Zibbet, ArtFire, or your own website. And don't worry; they're easier than you think!


1. The item itself. This seems obvious to most of us, right? But it goes beyond just the basic shirt, jewelry, card. What kind of shirt is it? What kind of jewelry? Is it a silk tie-dyed tunic? Turquoise wire-wrapped earrings? What else is included with the purchase? Does your photo show the item on a table with a few other things? You should crop the photo, but that's a blog post for another day. In the meantime, make sure your buyer knows exactly what is being offered for sale and what is not included.


2. Color. Keep in mind that all monitors are different and that everyone can have different settings which can change how color is viewed. I find it's easiest to be as specific as possible when describing color. Not very color savvy? Grab a big box of crayons and match it up!


3. Size. How big or how small is your item? Be specific here. You can't list a bracelet and say it's smaller than a breadbox. Get a cheap tape measure at the dollar store and include measurements. If you're selling jewelry, make sure you let your buyers know how long the item is. Pictures can't always convey length properly. If you're selling clothing, make sure you include bust, waist, shoulders, and hip measurements along with the length. Remember, buyers can't hold your item or try it on! Let them know if it will fit them by being as specific as possible.


4. Material. What is your item made from? What kind of cloth/stone/metal/paper is it? How is it made? Is it serged/quilted/wire-wrapped/etc? 


5. Care instructions. Let your buyers know how they can keep your item clean, if necessary. If this is a clothing item or a purse, they will want to know. Can it be tossed in the washer or is it a dry-clean only item?


6. Weight. This can be helpful, and sometimes necessary. Are you selling gorgeous vintage earrings that weigh a ton and can only be worn by people with strong ears? Are you selling a heavy wool sweater? Let your buyer know.


7. Usage. How will the buyer use this item? If it's a bracelet, how does it stay closed and how can you put it on? The same goes for anything, really. Describe the buttons, the clasps, the zippers, ear wires, etc.


8. Feel. This is kind of subjective but I like to include this information when I can. Is something faceted or smooth? Is it soft, rough, textured, or silky? Lightweight, thick, comfortable?


9. Allergens. Make sure you include this information somewhere, whether it's in your profile, your bio, your policies, or the listing itself. Does someone in your house smoke? If yes, this needs to be disclosed. Do you have pets? Lots of potential buyers are allergic and would need to know this. You never know when a stray hair can end up in a package. Do you include dryer sheets when shipping? You probably shouldn't, but lots of sellers do, and this should be disclosed.


10. Packaging and shipping. How is the item going to be shipped? Do you use First Class, Priority, USPS? Or do you use UPS or Fed-Ex or another option? Buyers love to know this. How do you package the item? Do you lovingly wrap it in a gift-box, tie it with a coordinating ribbon, toss it in a baggie? Do you recycle packaging materials? I do, and lots of buyers love that. Lots more sellers are doing this, but make sure you disclose it somewhere so no one gets annoyed or offended. Are your packaging materials eco-friendly? Mention it!